This is a short article detailing the steps on how to set up the Akerna Check-In app on a Zebra TC21/EC50/EC55 device.
¶ Setting up the app
1. Connect your device to a reliable Wi-Fi network by pressing & holding down the Wi-Fi symbol;
NOTE! Unless you are configuring the Check-In app for the first time for your company, please skip to step #4.
2. Create a Gmail account for use in the device, e.g. mycompany.checkinapp@gmail.com on https://accounts.google.com/signup
NOTE! You only need one Gmail account for all devices across your company.
3. Request to whitelist your newly-created Gmail account via an email to the responsible representative at support@365vertical.com; This has to do with Google content control of cannabis related products.
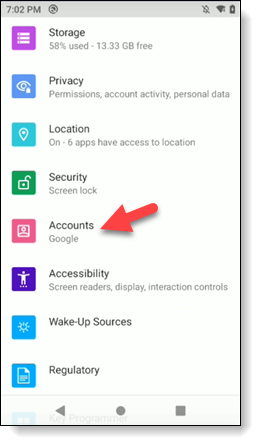
4. Sign in to the Gmail account in the Zebra device;
⠀1. Go to Settings → Accounts → Add Google account.

5. Open the Play Store app and find any free QR scanner app (we recommend to use QR & Barcode Reader app from TeaCapps);
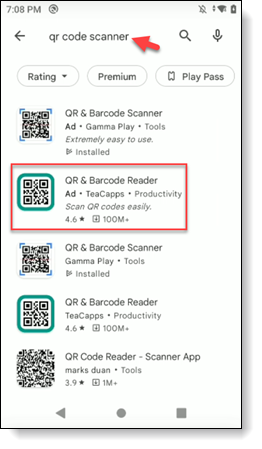
NOTE! Use this scanner app to open links from this guide on scanner device.
6. Follow this link to gain access to the (currently) unreleased test build of the app: https://play.google.com/apps/internaltest/4698516202323159316

7. After accepting the invitation to access the app, download it from here: https://play.google.com/store/apps/details?id=com.akerna.checkinapp

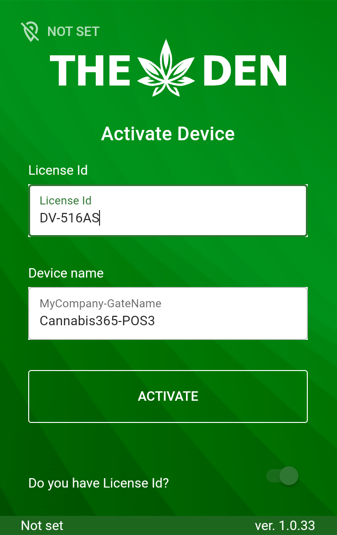
8. Device activation:
8.1. Open application, you will be prompted with activation screen. Input device description to easily identify it by it's location. Use the following logic for name creation: CompanyName-GateName Example: Cannabis365-POS3
8.2. To automatically activate the device you need to active "Do you have License Id?" A new field "License Id" will appear. Input the activation code received via email.
8.3. Press "ACTIVATE" button.
8.4. If device was assigned to a customer it will automatically open navision login form and you can skip to step 9.
8.5. If device activation failed it will display message with device name and it's license status. Please reach out to support@365vertical.com to activate the device. Supply them with the device name that is shown in the screen.
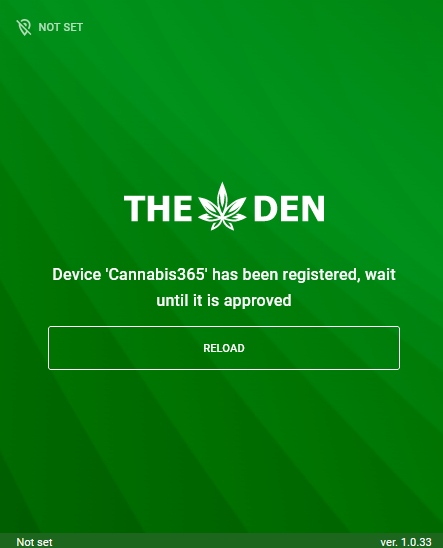
8.6. When device is activated manually by Akerna personell press "RELOAD" button and you will be able to continue with the normal application flow.
9. Launch the Check-In app and enter your "Staff" login details. Identical to POS terminal logins;
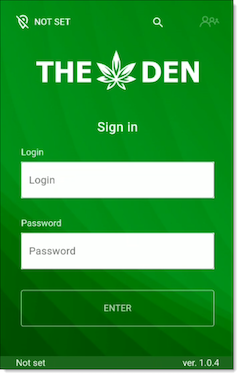
10. After entering your details, press the Enter button to be taken to the store select screen;
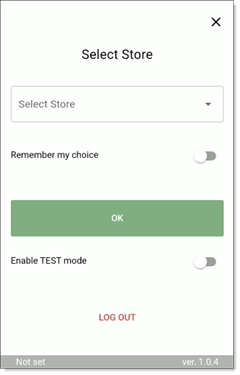
11. After selecting a location, you'll be taken back to the main login screen. Press "ENTER" to login to the application.
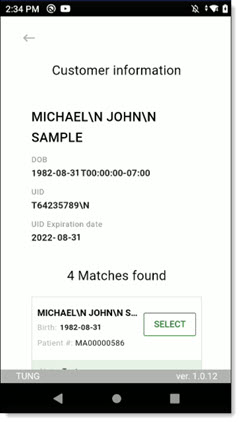
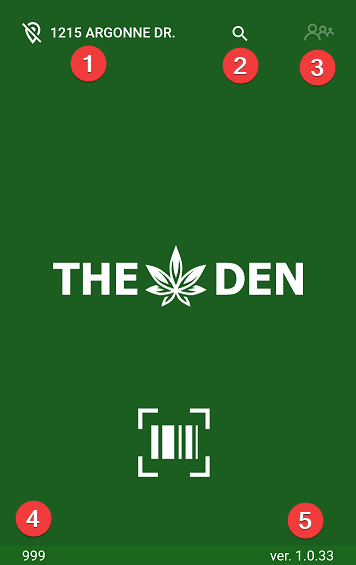
12. Here is the breakdown of properties shown on the screen after logging in:
1. Current selected store location. When pressed upon it will act as store selector.
2. Manual contact search.
3. Customer waiting list. This allows to inspect current queue, taking notes and voiding transactions.
4. Currently logged-in staff id indicator.
5. Application version.
⠀
¶ Setting up DataWedge
This chapter shows how to set up the scanner manually.
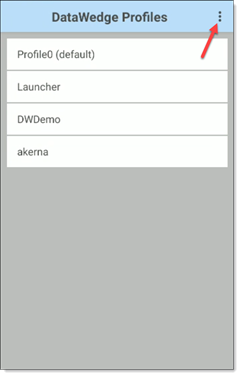
1. Open the DataWedge app and select the DataWedge Profile menu in the top right corner;
2. Select New profile;

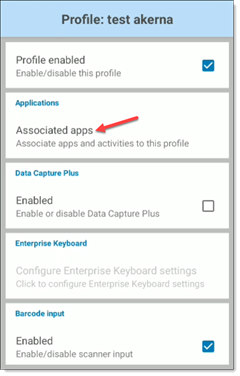
3. Open the DataWedge profile, then select Associated apps;
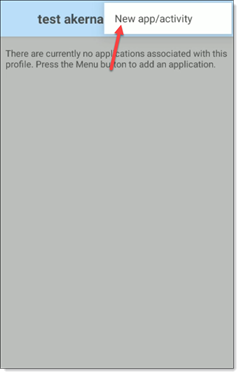
4. From the top-right corner open the Associated apps menu, and hit New app/activity;
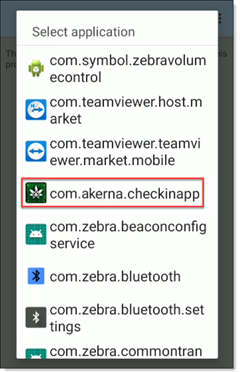
5. Scroll down the list to find an application called com.akerna.checkinapp;
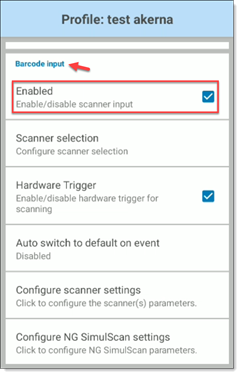
6. Go back to the profile settings, and scroll down to Barcode input, then enable it;
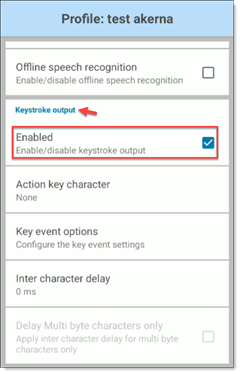
7. Keep scrolling until you get to Keystroke output, then enable it;
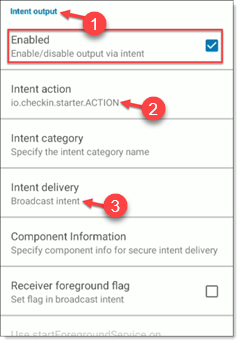
8. And finally, scroll down to the end to find Intent output.
⠀1. Enable Intent output;
⠀⠀2. Set the Intent action to io.checkin.starter.ACTION;
⠀⠀⠀3. Set the Intent delivery to Broadcast intent.
⠀
¶ Using the Check-In app
1. Open the application and login with your Staff ID.
2. Scan barcode.
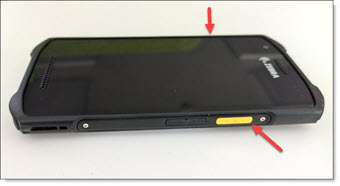
1.1. Press and hold the either of the yellow hardware buttons found at the side of the zebra device.
2. Scan the PDF417 barcode on the back side of the goverment ID of the customer;

3. Check if you can see the ID details in the Check-In App. If you can see the customer's details, the app has been set up correctly, and is ready for use.